Howdy everyone,
Today I'm going to share with you a commission project I completed recently to convert a Angron Demon Prince.
I began by selecting a piece of artwork that I've always loved and been inspired by:
This piece of art was selected from the Horus Heresy collected visions.
The client specified that he wanted 'Angron' to be larger than a standard Demon Prince but small enough that he can be used in games of Warhammer 40K.
The first thing I do with any conversion project that I'm working upon is to go through all of my bits boxes and full out any parts that I think are appropiate for the project and pile them in front of me, pour myself a cold beer and wait for inspiration to take hold:
I decided that the plastic Demon Prince kit would be a good enough place to start as any so I popped over to Warhammer World and grabbed one. With my trusty razor saw and pack of blu tac in hand I began chopping away and soon after had the following:
The wings are from the Terrorgeist kit left over from the Heldrake conversion. The metal shoulder pad is from an old Demon Prince. The back is from the plastic Helbrute that comes with the 40K starter kit.
The metal ring over the head is from the back pack of Huron I believe?
After staring at the source artwork for a little longer I decided that to extend the neck I will require another kit. Initially I was going to go with the Balrog kit from the LOTR game but settled on using the Terrorgeist kit instead because of all the extra bits you get in the kit. Again I popped over to Warhammer World and made my purchase. A few more cuts here and there and I had the following:
Here I have split the back from the Helbrute kit to allow the Terrorgeist spine to be installed.
The groin plate was taken from the Helbrute kit. I opened up the torso where the head will be installed.
Here I am dry fitting the torso together with blu tac.
This is the head from the plastic demon prince kit that I selected to use as the starting point.
The Terrorgeist spine was cut to allow it to form the neck of Angron.
Here I have cut the demon prince head in halve and replaced the lower jaw with one of the jaws of the Terrorgeist kit.
Here I am establishing the basic pose to mirror the artwork.
Installing the head to the neck.
Here you can see how large this model really will be. I used the legs from the Terrorgeist kit.
Here is a size comparision of Angron standing next to a Chaos Space Marine. He is pretty huge. The metal hand is taken from a Obliterator.
I decided that I wanted Angron to be kneeing on a pile of fallen enemies so I cut his right leg and repositioned it to a height I was happy with.
Here I am beginning to blend in the cuts with Milliput. I'm also adding piping using the 'Greenstuff Industries'' Tentacle Maker'. You can find a link to the supplier here:
Turning my attention to the base I purchased a boxed set of the new tactical marines and began chop chop chopping and laying them upon a cork sheet base.
Here is Angron positioned upon the top of the fallen Space Marines.
After positioning Angron I thought his back looked a little strange and decided to sculpt a cloak out of Greenstuff which also ties in with the Forgeworld miniature.
I wanted the cloak to look as if it has been through many battles and barely fitted his Daemonic form.
Looking at the shoulder pad I thought it was a little plain and decided to form the World Eaters Icon on it with plasticard.
I then turned my attention to the axe Gorefather. It had to be big, really big!
Here is the basic construction made from styrene tube, a fantasy battle skull and pieces from my bits box. The icons are from the Chaos Space Marine vehicle kit.
Next I wrapped the handle with thin greenstuff.
Finally I added studding.
I found some suitably sized chain to apply to the model from a hobby shop which is used for making jewelry. I then began wrapping it around his arm.
Here is a close up of his latest victim. Also you can see the chains with skulls at the end.
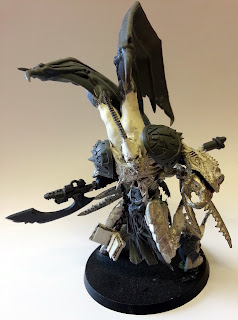
The client asked for fur to be applied to the cloak. Having never sculpted fur before I was more than a little worried about ruining the project. Here are shots of my attempt, I quite happy with the result, not quite Forgeworld standard but I think I pulled it off okay?
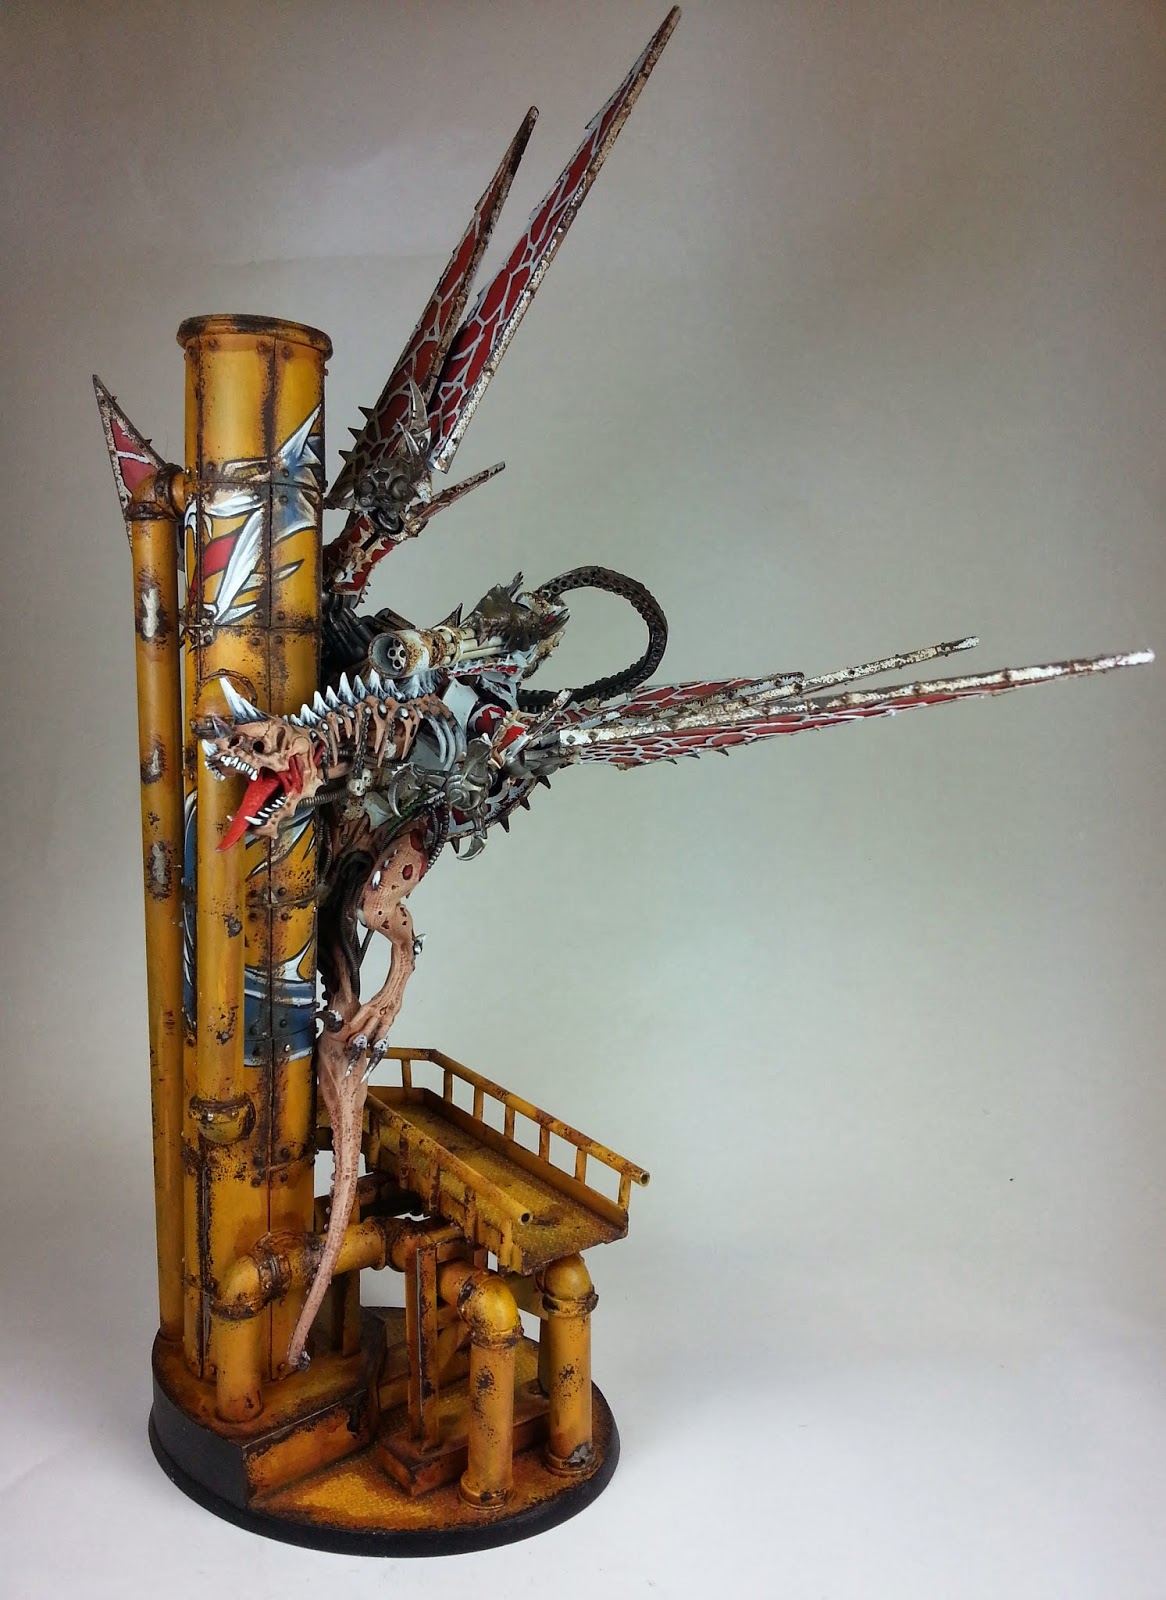
And finally here are shots of the final piece before I packed him up and sent him off to his new home in the states. He will be missed and personally I think it's my finest work to date. So much so I'm turning my attention to selling off my Serpent Guard army in the next couple of weeks to fund a new army lol.
The following is a link to a video of the finished Angron on my YouTube channel. Please go check it out, comment and like if you enjoyed it? Also let me know if you came to my YouTube channel via here?
Happy hobbying,
Rumplemaster